
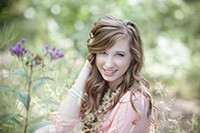
Below are a few before and after examples of the Image Perfector Preset.
Click here for all of the details.
The images on the left are straight out of the camera, and the images on the right show the after with just the preset applied. No additional color or exposure correction was applied.
[image-comparator left=”https://weddingsbyheather.com/blogsite/wp-content/uploads/2016/04/13-7018-post/Before_0002.jpg” right=”https://weddingsbyheather.com/blogsite/wp-content/uploads/2016/04/13-7018-post/After_0002.jpg” width=”600 px” classes=”hover”][/image-comparator]
[image-comparator left=”https://weddingsbyheather.com/blogsite/wp-content/uploads/2016/04/13-7018-post/HJL_9081.jpg” right=”https://weddingsbyheather.com/blogsite/wp-content/uploads/2016/04/13-7018-post/HJL_9081-2.jpg” width=”400px” classes=”hover”][/image-comparator]
[image-comparator left=”https://weddingsbyheather.com/blogsite/wp-content/uploads/2016/04/13-7018-post/Before_0005.jpg” right=”https://weddingsbyheather.com/blogsite/wp-content/uploads/2016/04/13-7018-post/After_0005.jpg” width=”600px” classes=”hover”][/image-comparator]
[image-comparator left=”https://weddingsbyheather.com/blogsite/wp-content/uploads/2016/04/13-7018-post/006.jpg” right=”https://weddingsbyheather.com/blogsite/wp-content/uploads/2016/04/13-7018-post/006-2.jpg” width=”400px” classes=”hover”][/image-comparator]


Love this preset already- thanks Heather and Leeann!
Now that I’ve had the chance to use this preset on an entire wedding gallery, I am absolutely blown away by its capabilities! I’ve been looking for a preset that sharpens and improves skin tonality- this preset does all of that and more! It softens skin, too, which will save me *so* much time because I won’t have to take nearly as many images into Photoshop. I have been looking for a preset like this to come around, thinking I’d have to buy multiple presets to get the look I want. I can’t believe it is everything I’ve been looking for all in one preset! It works beautifully on detail images, too. This will give me so much time back- it will give me my life back! It is hands down the best and most universal preset I have ever bought. Thank you SO much, Heather and Leeann!!!